It’s always good to clean and re-organise your craft room because you never know what you might discover! Today I’m using up my scraps of X-Press It Sticky Barc .
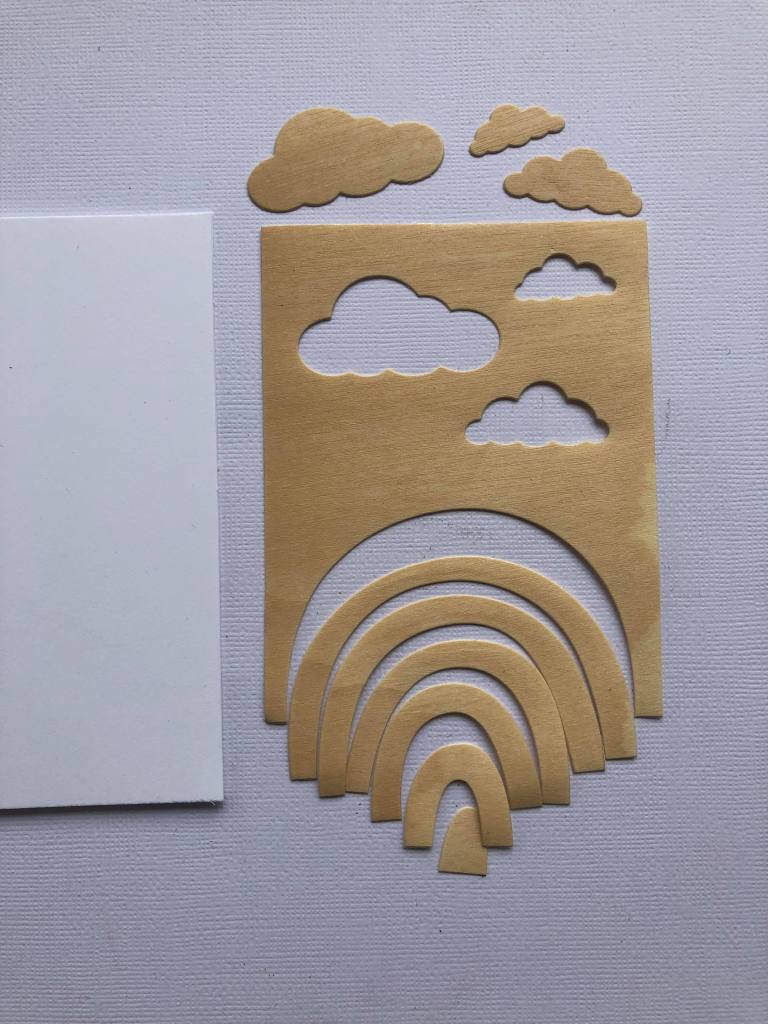
Sticky Barc is thin sheets of timber with an adhesive backing, they come in roughly an A4 size with two colours available – white birch and cherry.
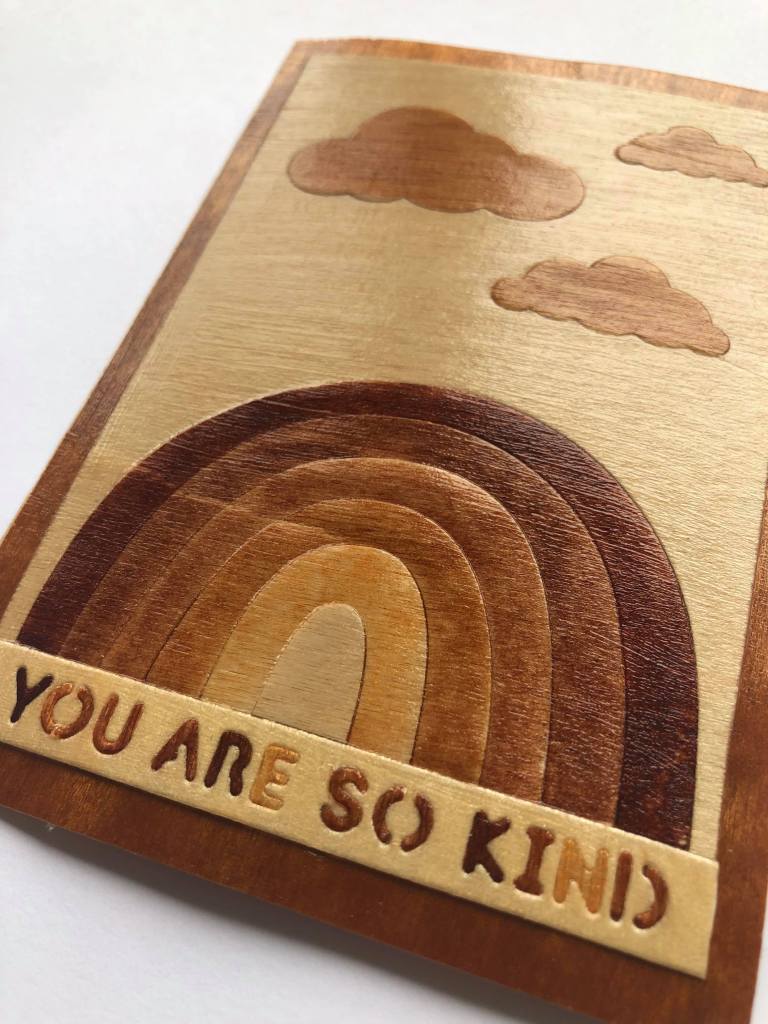
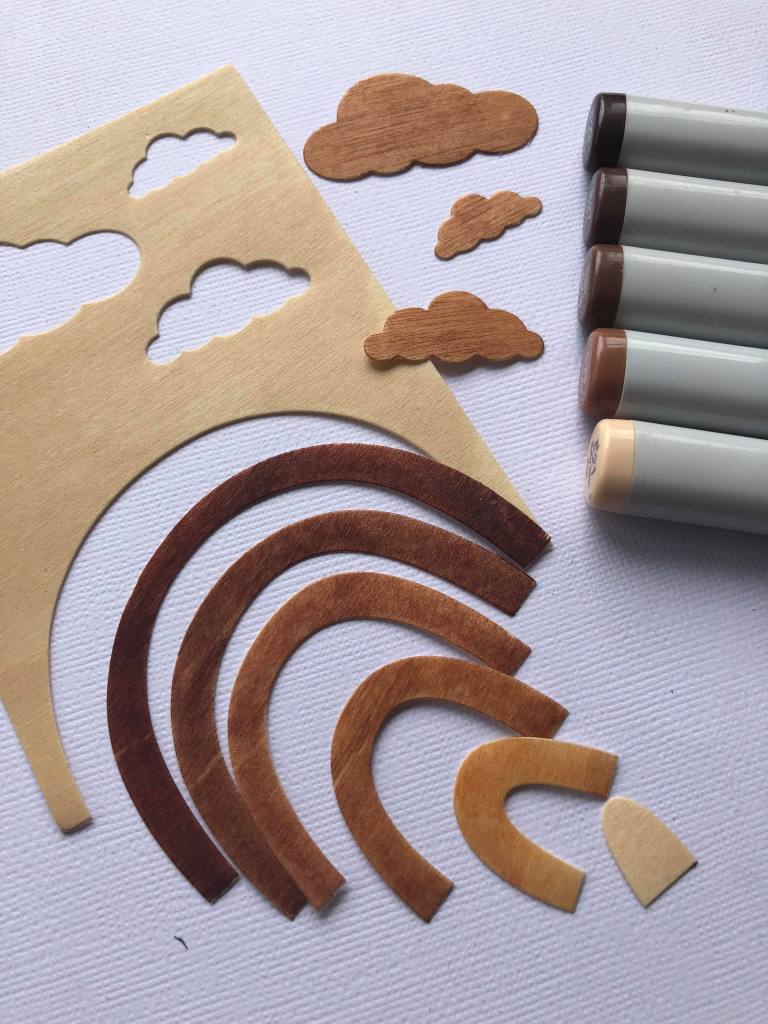
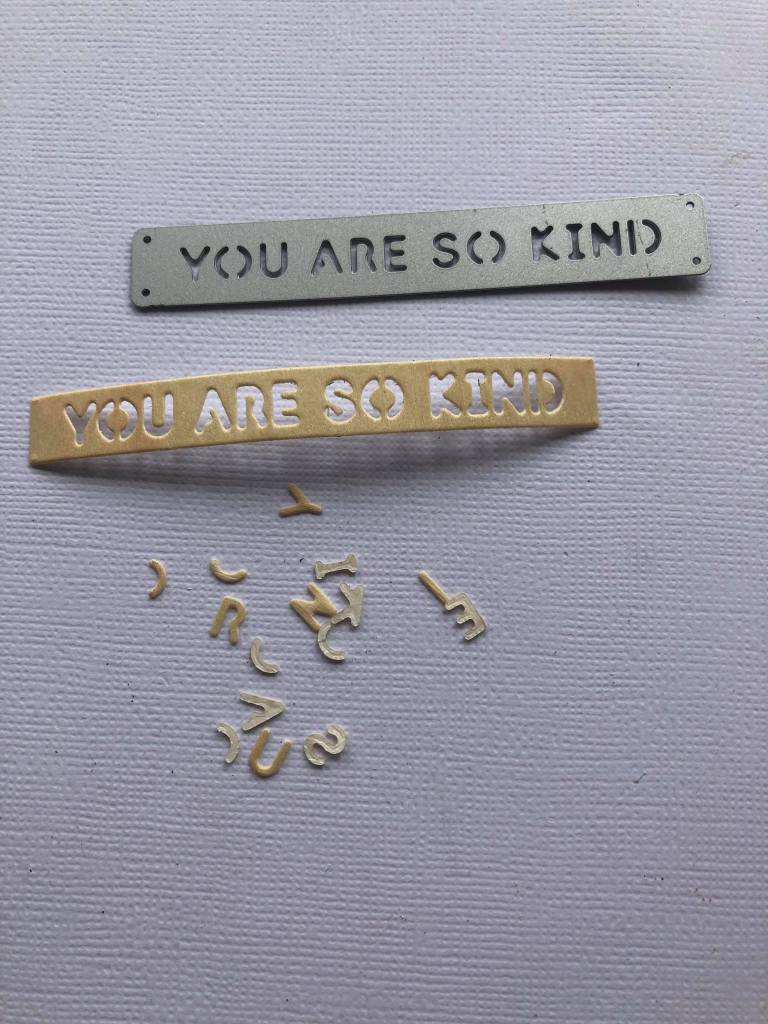
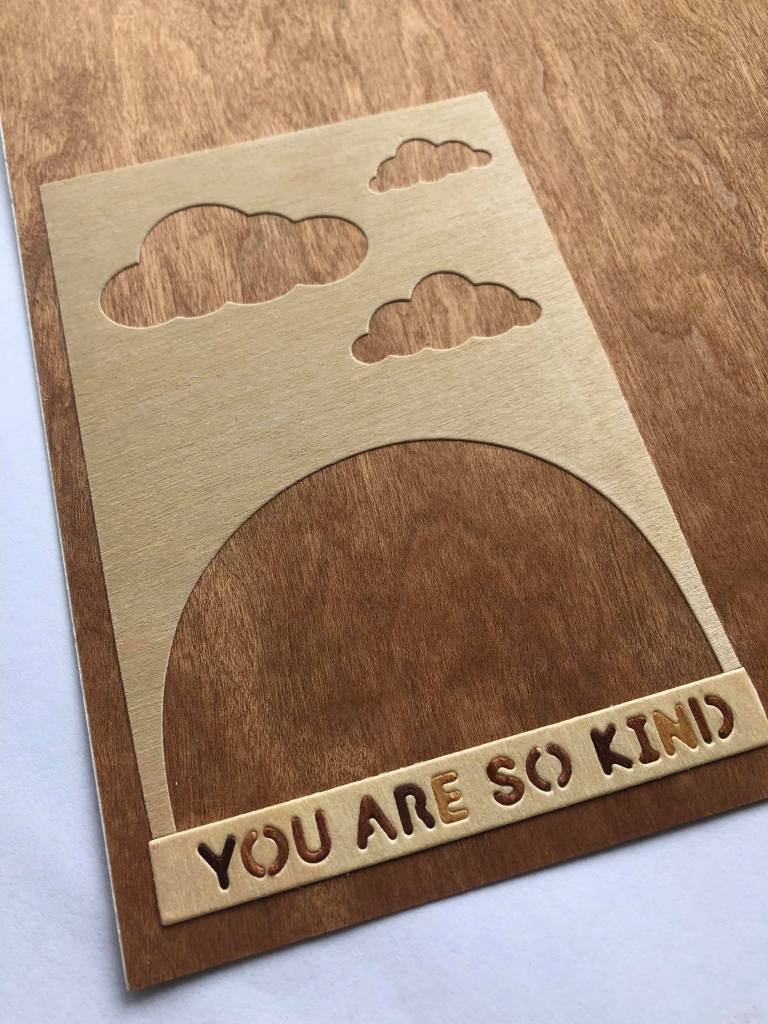
I wanted to create a parquetry inlay effect, so I gabbed some of my metal dies and away I went, I must say it was very easy to cut, no problem what so ever. I coloured the Sticky Barc using Copic markers but I’m sure you could use pencils, ink pads or paints. I have stamped on the Sticky Barc and unfortunately some markers will bleed, so having the pieces cut and seperated will stop this from happening.
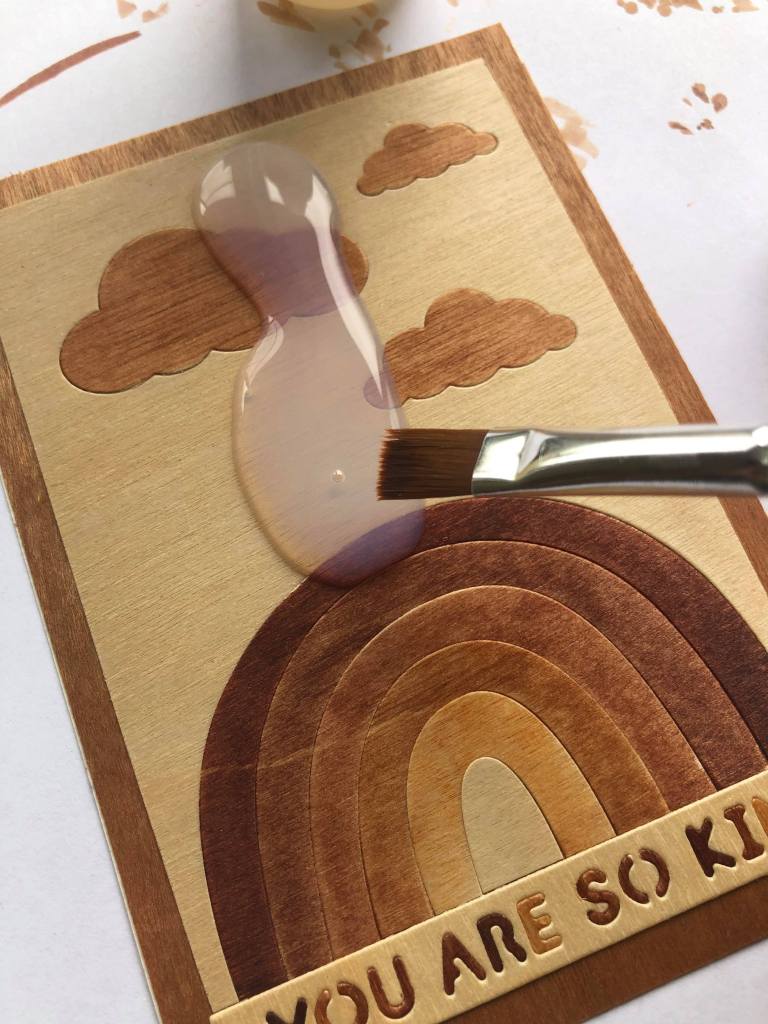
The different shades creates a fantastic variety of timber types. Just a warning, it is real timber so be careful when handlying it because it can chip,, crack or crease but hey that’s part of the charm.The sentiment was the most fiddliest part, have lots of patience and try not to lose the small inserted alphabet pieces, just talking from experience! LOLDie-cut your piece of Sticky Barc and seperate the pieces. I used MFT Rainbow Whimsy and Memory Box small cloud dies.I coloured the pieces using Copic markers E21, E23, E25, E27 and E29, the smallest piece I left uncoloured.I used a Altenew Essentials Senitment Strip die and cut my sentiment from another piece of leftover Sticky Barc, I coloured the letters using the same Copic markers. Add a strip of double-sided tape to the back of the Sticky Barc sentiment strip then insert the letters.Attach the die-cut pieces on a sheet of Sticky Barc Cherry timber, trim leaving a small border.Remove the adhesive protective backing from the pieces and insert them as shown. Apply a coat of Dimensional glue or another glossy varish over the top to give a lovely finish to the panel.
Well I LOVED using this product again, so much so that I’m going to buy some more LOL, can’t help myself!