Case me a Christmas Card with Michelle Lupton and Friends.

I’m always thrilled when Michelle asks me to participate in her awesome Case me a Christmas Card Challenge, it always makes me think outside the square and I also get to see so many wonderful creations. In case you didn’t know what CASE means, it’s “Copy and Share Everything”.

Click HERE to visit Michelle Lupton’s Blog and see which card Michelle picked of mine to CASE.

Click HERE to see which card of Michelle’s that I CASE’d 🙂

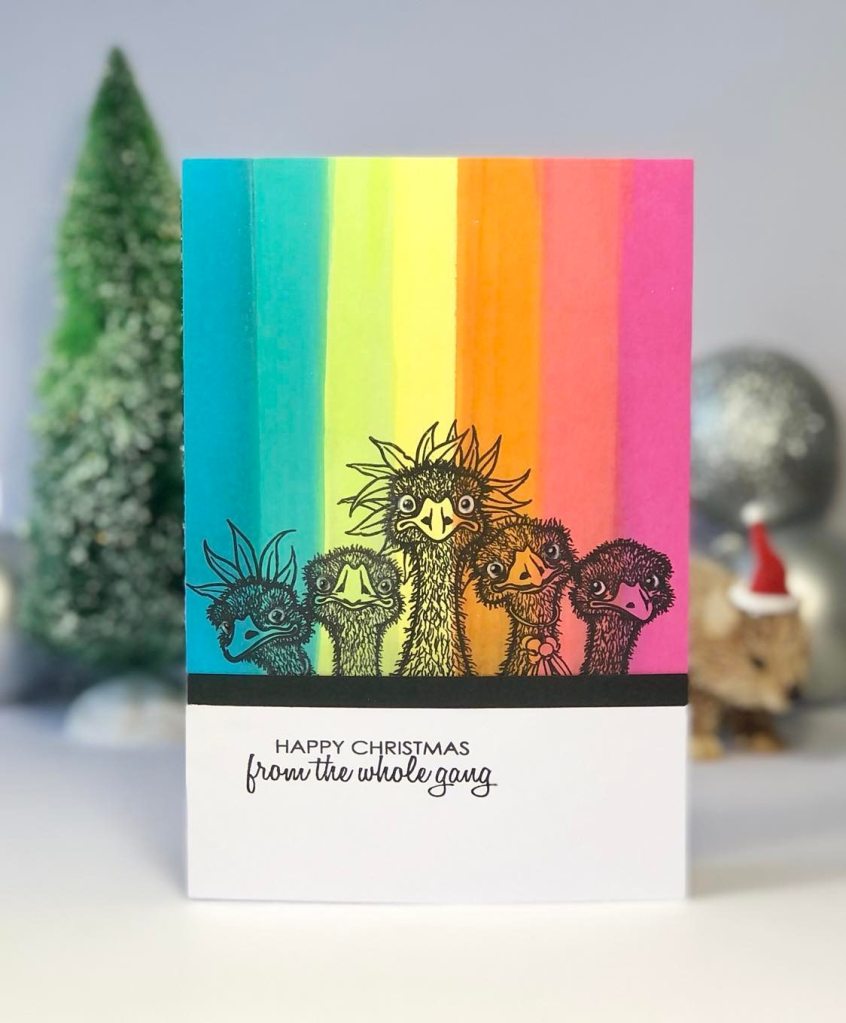
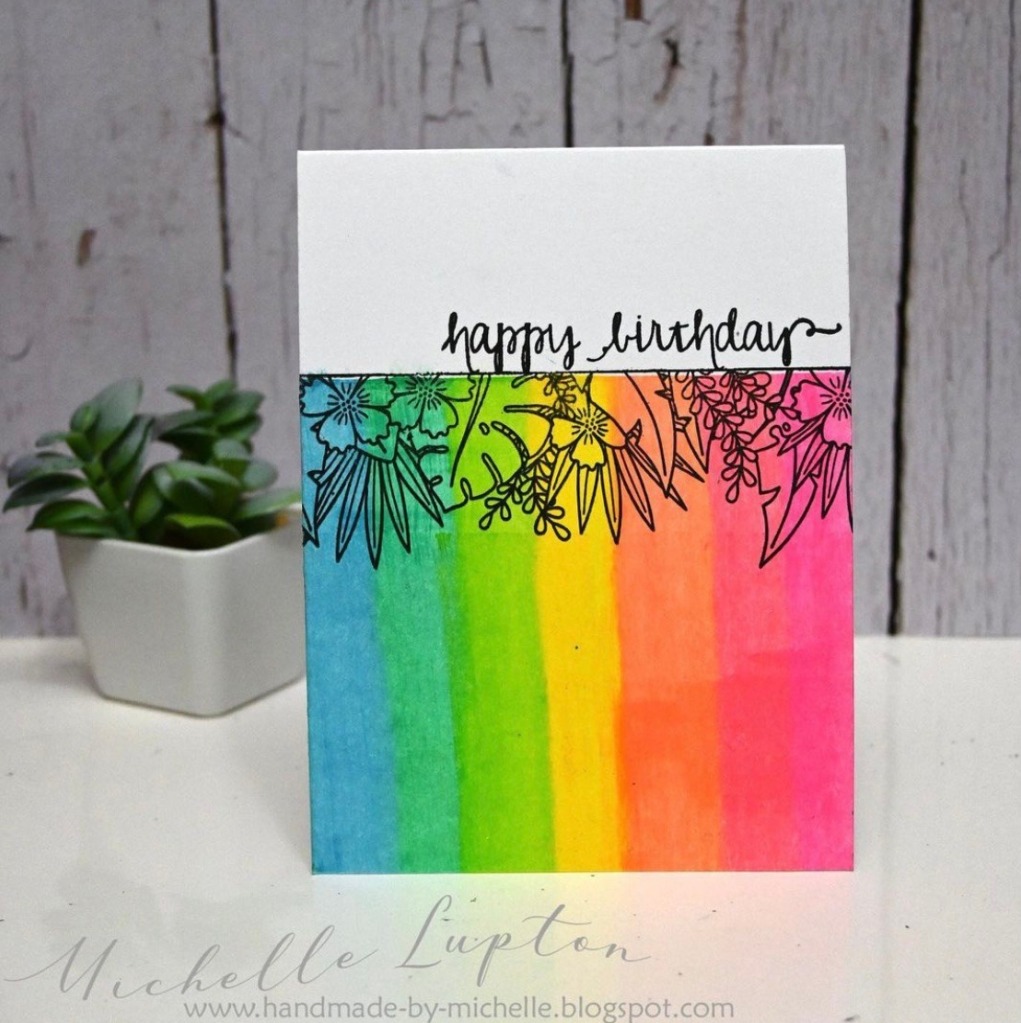
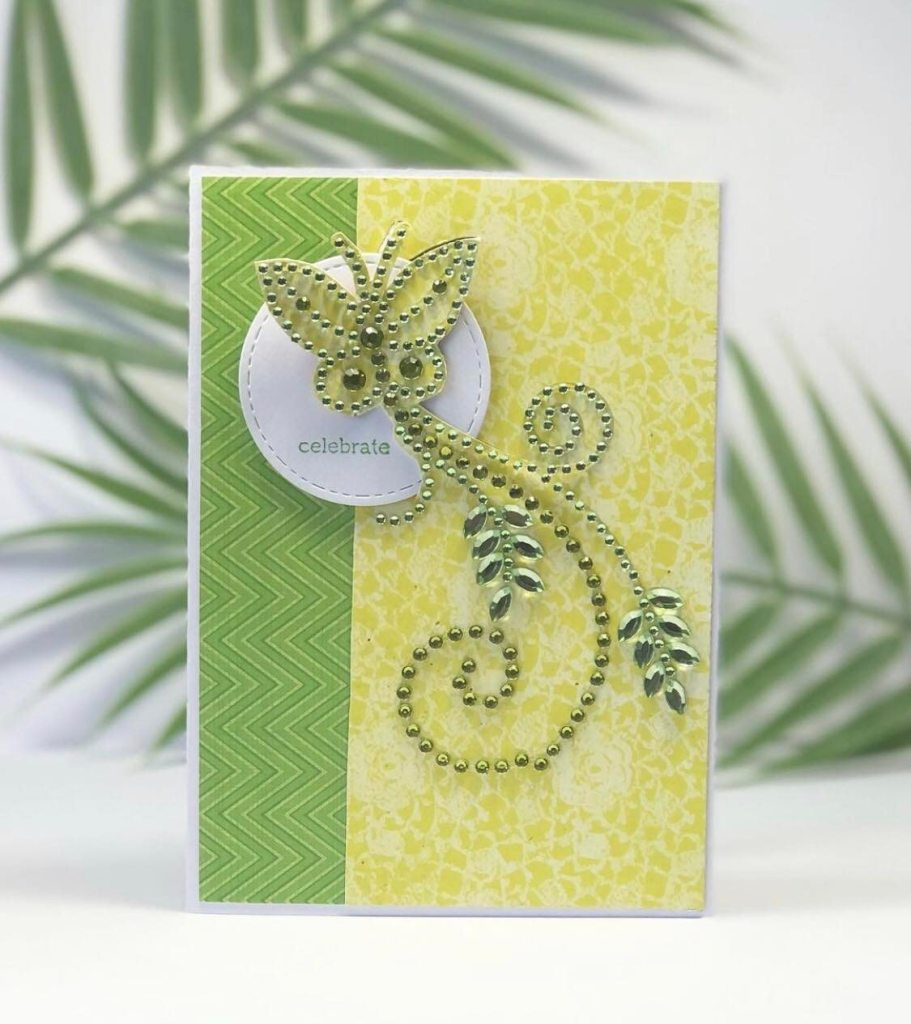
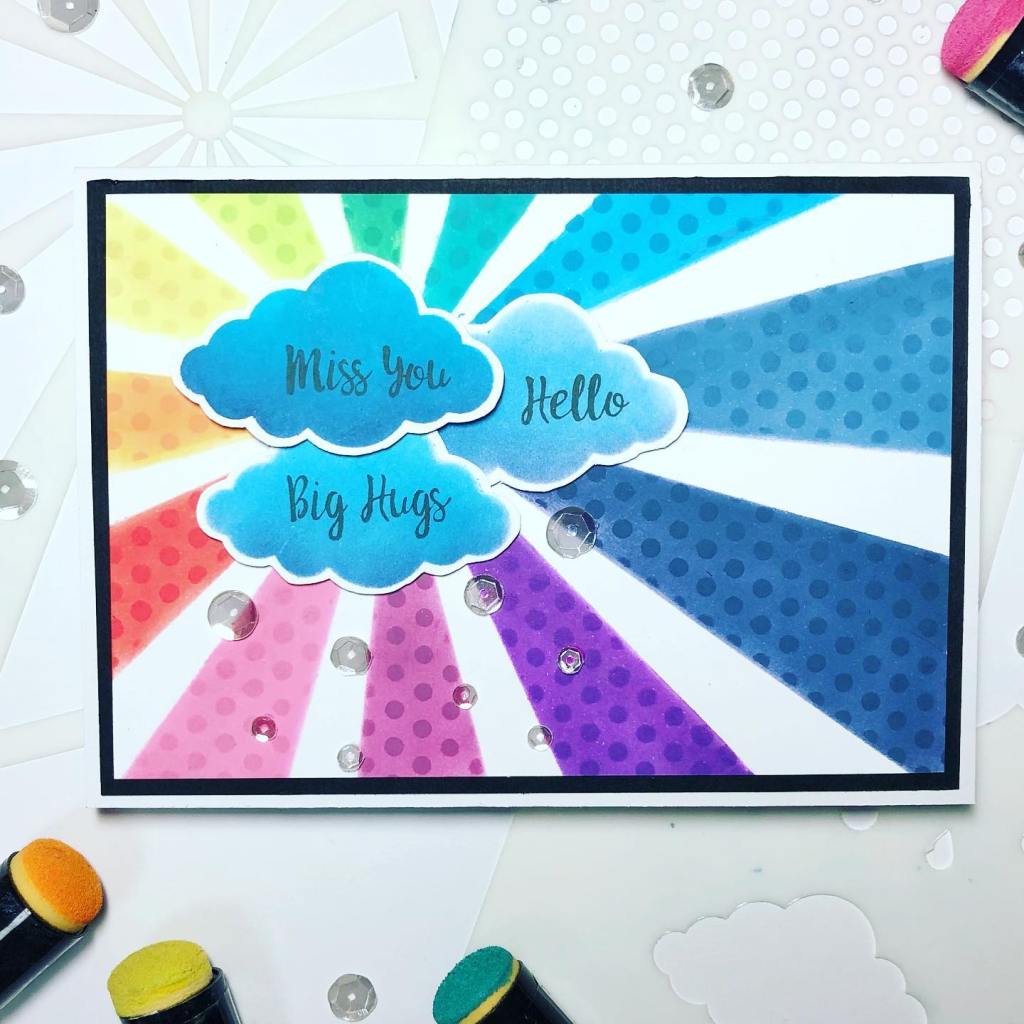
The hardest part was choosing just one of Michelle’s made, they’re all so beautiful and inspirational. I picked her gorgeous colourful butterfly card and re-created it using a Christmas holly die.

Steps:

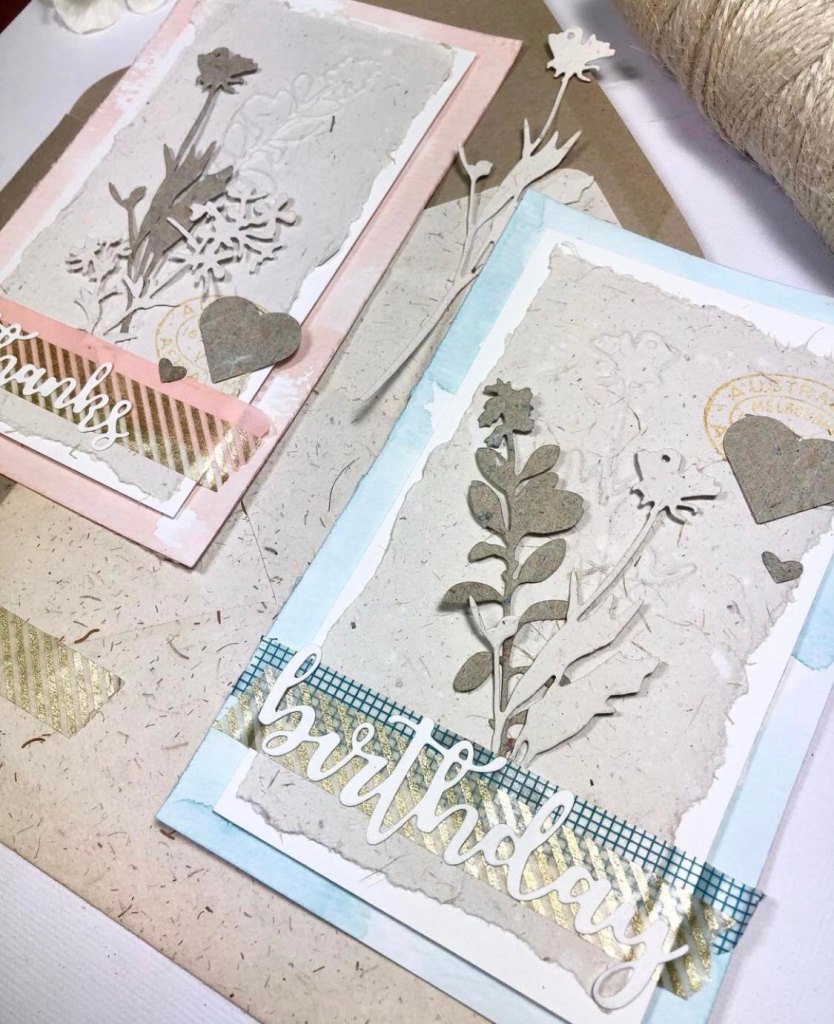
  1. Die-cut two Kaisercraft Holly Sprigs from yellow, orange, red, green and blue card to make ten in total. Arrange and glue them on the front of folded white card in colour order as shown. Let dry, trim the over-hanging edges using scissors.
  2. Die-cut ten more Holly Sprigs from white card, glue them over the coloured Holly Sprigs so they are slightly off centred, just have a peek of colour showing. Let dry, trim all the over-hanging edges.
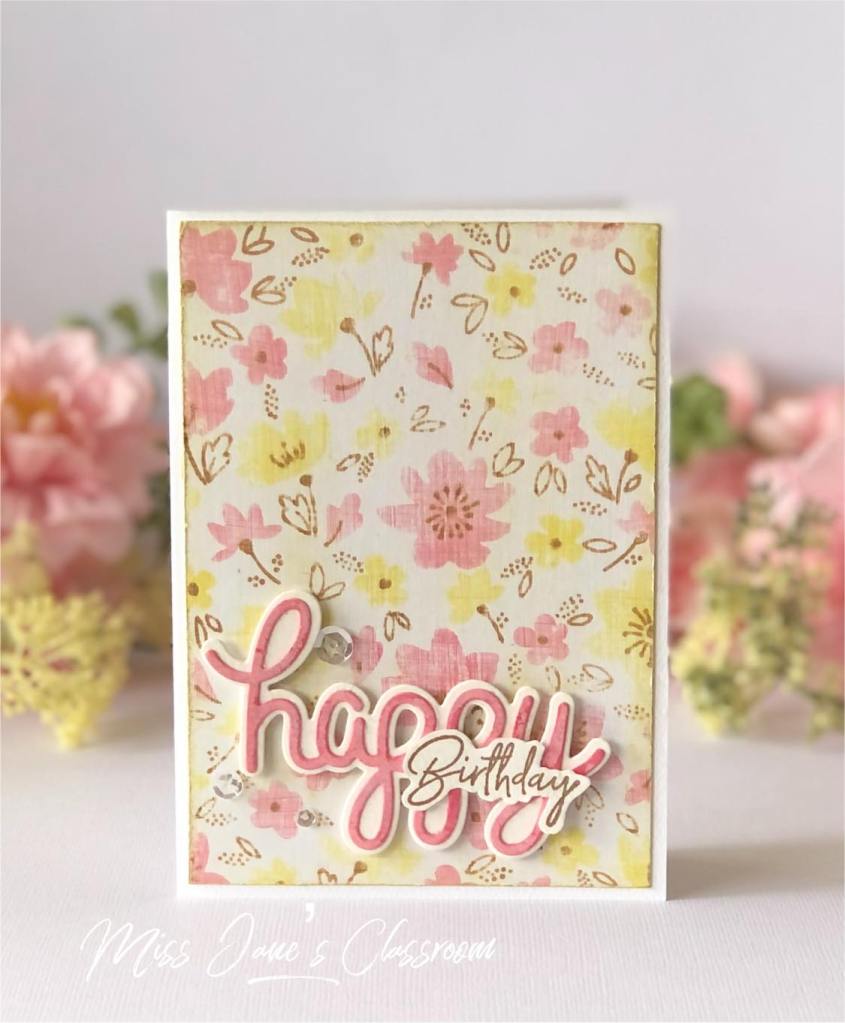
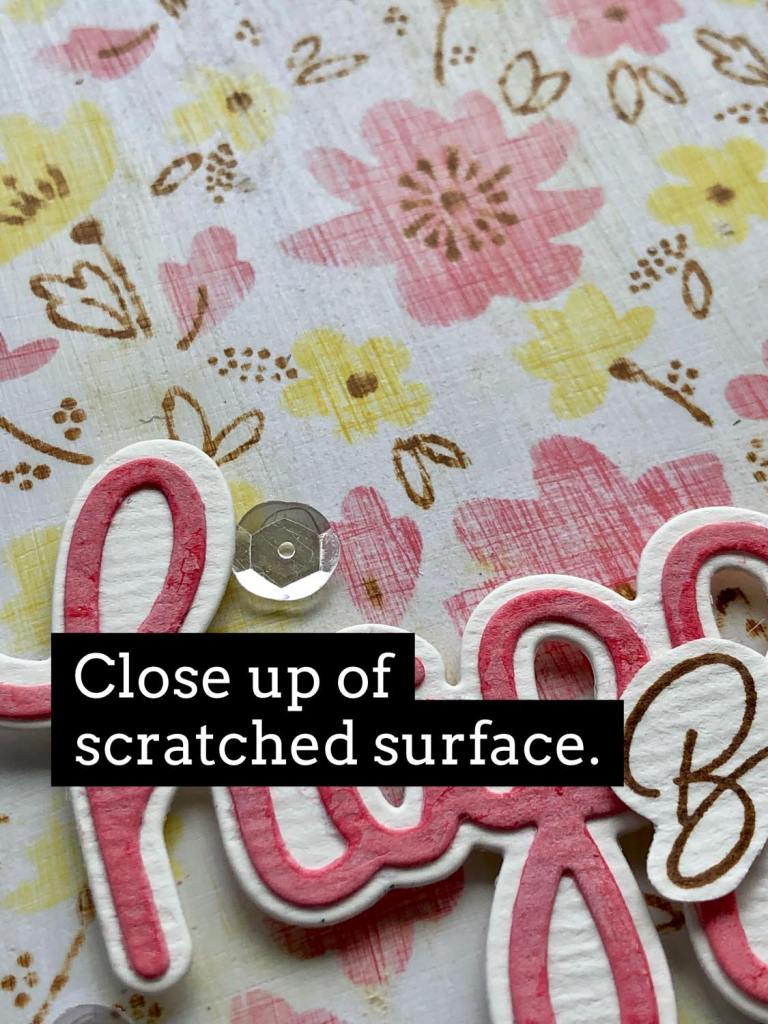
  3. Stamp, print or use a pre-made Christmas sentiment and add this to the card using foam mounting tape. I used an image from Cricut design space for my Merry & Bright.
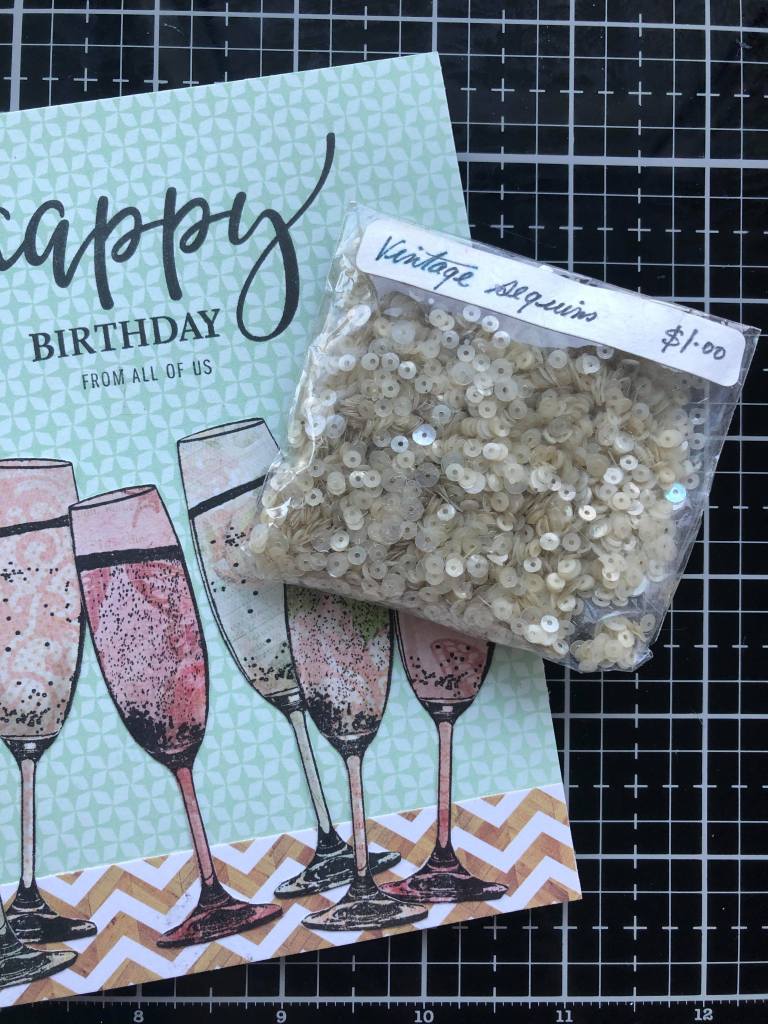
  4. Adhere a scattering of crystal sequins on the card to finish.

IDEAS

  • You could use any Christmas motifs eg: Bells, Mistletoe, Santa Hats etc.
  • Leave off the top layer of white die-cuts to have a brighter version.

Creating cards using the CASE method is a great way to get out of a creative flunk!

Don’t forget to check out all the other creatives who took part in this great challenge, you’ll see some genius ways to CASE a card.

Don’t forget to check out Michelle’s other cards too!

Thanks for reading and happy creating!

Miss Jane xx

Case me a Christmas Card with Michelle Lupton

I always feel tickled pink when Michelle Lupton invites me to take part in her annual CASE me a Christmas card series. The idea is that I see a card that I love that she has created and I CASE it and the same for Michelle, the big problem is that I LOVE all her cards and can never decide LOL.

CASE means to copy a card with credit going to the original designer.

Check out Michelle’s creation that she CASE from one of my cards HERE.

This is my creation that I CASE from Michelle, I just love the vibrant coloured stripes on her card and thought what a fabulous Christmas card it would make. I used Beccy’s Place Emu Parade stamp set and various Distress ink pads.

Don’t you love this little fella? I bought him in a local shop here in Moree!

This is Michelle Lupton’s card that I CASE, I have been given full permission to share. Isn’t it gorgous! Of course my card is upside down Miss Jane LOL

Go and check out the CASE card series HERE, it’s a great way to get ideas!

Thanks again Michelle for inviting me.

Happy Creating everyone, love Miss Ja e xx

Use It Monday updates

I don’t know about you but I’m really enjoying Mondays! Looking through my cupboards, rumaging through drawers, opening storage boxes and discovering long lost treasures is very exciting! Maybe you should pick a day and make it your “Use it day”.

Here’s a recap of the last four Mondays, enjoy!

Embossing Powders, I have a wonderful collection of beautiful colours but just forget to use them, so they and we had a little play. The die-cut fronds fell this way on my card and viola a Christmas tree was made LOL
Handmade Papers – I’m a sucker for beautiful handcrafted papers, the photo doesn’t do any justice to these pretty papers, the texture is just devine! Yes we’re always keeping them for a special card but do we ever cut them up? No! Well it’s time I say! Start using your stash!
Do you hoard stuff just beacuse you know you can’t buy them anymore? But hey, seriously, there is always going to be pretty stuff to buy, right? It’s no good just sitting in it’s packaging, no one is enjoying it that way. Just use it!
Oh man I forgot how delicious looking H2o’s are! They have great hues and glimmer beautifully, I must use these more!! This card took me ten minutes to create, serious!!

Well there you go, that’s just four items I’ve reaquainted myself with. Start looking through your stuff, it’s like shopping in a craft store LOL.

Happy Creating, Miss Jane

Use it Monday – Sticky Barc

Gidday!

It’s always good to clean and re-organise your craft room because you never know what you might discover! Today I’m using up my scraps of X-Press It Sticky Barc .

Sticky Barc is thin sheets of timber with an adhesive backing, they come in roughly an A4 size with two colours available – white birch and cherry.

I wanted to create a parquetry inlay effect, so I gabbed some of my metal dies and away I went, I must say it was very easy to cut, no problem what so ever. I coloured the Sticky Barc using Copic markers but I’m sure you could use pencils, ink pads or paints. I have stamped on the Sticky Barc and unfortunately some markers will bleed, so having the pieces cut and seperated will stop this from happening.

The different shades creates a fantastic variety of timber types. Just a warning, it is real timber so be careful when handlying it because it can chip,, crack or crease but hey that’s part of the charm.
The sentiment was the most fiddliest part, have lots of patience and try not to lose the small inserted alphabet pieces, just talking from experience! LOL
Die-cut your piece of Sticky Barc and seperate the pieces. I used MFT Rainbow Whimsy and Memory Box small cloud dies.
I coloured the pieces using Copic markers E21, E23, E25, E27 and E29, the smallest piece I left uncoloured.
I used a Altenew Essentials Senitment Strip die and cut my sentiment from another piece of leftover Sticky Barc, I coloured the letters using the same Copic markers.
Add a strip of double-sided tape to the back of the Sticky Barc sentiment strip then insert the letters.
Attach the die-cut pieces on a sheet of Sticky Barc Cherry timber, trim leaving a small border.
Remove the adhesive protective backing from the pieces and insert them as shown. Apply a coat of Dimensional glue or another glossy varish over the top to give a lovely finish to the panel.

Well I LOVED using this product again, so much so that I’m going to buy some more LOL, can’t help myself!

Happy creating, Miss Jane xx

A simple Serviette Technique

I can’t walk past a pretty serviette, can you? I’ve been using them to make cards for so many years, this is one of the way I use them to create cards, enjoy!

Be carefully because serviette collecting is extremely addictive!! I built up my collection over years by swapping and sharing with friends, but are they enablers? Am I the enabler? LOL Just enjoy!

Oh be very careful when applying the serviette onto the Mod Podge acetate, it gets very delicate when wet.

Happy creating, Miss Jane xx

Use it Monday – 6×6 paper pads

I love Mondays now, it means I get to choose a product of mine that has been sitting in my stash neglected or I’ve been keeping for that “Special” card.

Today I’ve decided to grab my jammed pack container of beautiful 6×6 patterned paper pads, to be honest I haven’t even opened this comtainer for probably six years! I used to use them on every card I made, well just about.

What perfect way to use these beautiful condensed patterned paper than to stamp on them and fussy cut them out. I have used Darkroom Door Celebrations and Birthday Greetings stamp sets to create this card.

I really don’t think my collection is that big, I know some friends who have twice as much!

I also used some vintage sequins which I’ve had for about ten years, seriously….am I the only one who stores stuff?? Surely not! I bought them at a market, she has so many beautiful vintage fabrics, laces, sequins etc.

The sequins are so beautiful in colour and so small, they were perfect for this card.

Well off you go, get out those 6×6 paper pads and start using them!

Happy creating, Miss Jane xx

A few commissioned cards

I love it when someone asks me to make a special card for a special someone in their life! It reminds me why I enjoy cardmaking so much…. knowing the recipient is recieving a personally designed card just for them, not some random store bought piece of cardboard…..although behind these store bought cards are some wonderful creators who have design them, but hey mine are one offs! mistakes and all LOL.

Here are a few I’ve made in the last month, enjoy!

The 50 I cut from silver foil card using my Cricut machine, the Happy Birthday banner is a Paper Smooches stamp. The beverages images and embossed background came with a magazine I bought a long time ago. Coloured using Copic markers.
I created the moon using Distress Oxide ink pads Iced Spruce and Black Soot. Stamped images are My Favourite Things, coloured with Copic markers. The stars and 1st were cut from silver glitter card using my Cricut machine.
I cut the card from watercolour cards using my Cricut machine, I used black watercolour paint and placed silver foil board behind the cars lights. The paper die-cut images are from a pack I bought at the Reject Shop years ago. The sequin embossed background is Stampin’ Up!
I used Uniquely Creative stamps to create this card, the three circle panel is also a Uniquely Creative product. Coloured using watercolour and Copic markers. The 8th I cut using my Cricut machine.
The church, bride, groom, sentiment and doves are from Waffle Flower Wedding Day stamp set. I hand drew and coloured the images, arch, walls, floor and background using Copic markers.

Thanks for looking.

Happy Creating, Miss Jane xx

Uniquely Creative Cards

Another one of my favourite companies to create cards with! Enjoy this collectiion of cards, I hope it gets your inspiration pumping, don’t hesitate to ask me any questions on how I made them.

I made this card for a very special someone, my son’s girlfriend, she loved it. I used the Cake Builder stamp and die set, doesn’t it look just delicious! I want cake, now!

Sometimes it’s nice not to colour, just play with the classic gold, black and white combination. I used Uniquely Creative Succulents laser cuts, stamps and matching dies to create this card.

I just LOVE the fox in the Fox Builder stamp set, it has lots of little images that you can dress the Fox with, make a boy or girl card, it’s just perfect! I also used the Wavy Weave stencil for the background.

A baby girl card this time using the Fox Builder mini kit from Uniquely Creative, don’t you just love it! The hearts and the word Baby are laser cuts that are included in the kit. It’s a must have I reckon.

Oh man I had so much fun creating cards using the Under the Sea mini kit from Uniquely Creative, you can make so many underwater or on land scenes! I’m also loving slimline cards, you can extend your design and fit so much more on your card. I coloured all the images using Copic markers, the background is a paper that’s included in the kit.

My favourite!! I know, I say that a lot lol, but it’s because I have so much fun creating these little scenes, tucking the little bottle, snail, pearl and shells amongst the seaweed was fun! The bubble cave was creating using the Scene Builder 1 Die, it creates great dimension to the scene.

As soon as I saw the stamps this scene popped into my head, a seal sitting on an iceburg thinking of a warmer beach, fun isn’t it, I do get carried away sometimes. I’m such a lucky girl that I get to play with stamps are’t I?!

There you go, another collection of cards to inspire you.

Happy creating, Miss Jane xx

Darkroom Door Cards

You all should know by now that Darkroom Door stamps and stencils are a favourite of mine, I always feel tickled pink when asked to play with their designs. I’ve been a bit slack in showing them on my blog, so instead of individual posts I thought I would do a quick catch up of my cards that I made Darkroom Door products.

I used Darkroom Door DDRS29 Puzzle Pieces and DDRS034 Wildflowers Vol 2 stamp sets with Distress Oxide inks. I stamped the puzzles pieces on watercolour card then pulled the colour in to shade them. I was very happy with the effect, it was very simple to do.

I love my houseplants, they’re my babies! My favourite plant I own is my Monstera, so you can imagine how excited I was when Darkroom Doors released Tropical Leaves stamps and stencils. I also used the Happy Birthday, Brushed Sentiments stamp sets and small checkered stencil. I only used one ink pad too, Distress Oxide rustic wilderness.

This card was made for Rachel Greig’s Artful August Challenge. I sponged Distress Oxide chipped sapphire on navy cardstock using the Small Sunshine stencil, added a yellow paper circle then stamp a DDRS32 Gum Tree over the top.

I used Darkroom Door’s small lavender stencil to create this card. I created it because I was challenged to use Flower Soft wgich I hadn’t used it for years.

Created this card for the Artful August challenge as well. I used three stencils here, small sunshine clouds and small dots, I love how colourful it is.

This reminds me, I need to make about 20 of these to send to my beautiful friends, just so they know they’re stuck with me lol. I used Darkroom Door DDRS177 Cacti stamp set with the mini Friendship stencil and of course Distress Oxide inks.

This is a simple card but I love it. I used Darkroom Door DDRS219 Puzzle Pieces stamp set and drew the happy faces on them with a fine line pen.

Who doesn’t love cupcakes, these are such a good sized image to fit a card front too! I used the DDRS Curly Cupcakes, DDRS6 Brushed Sentiments and DDRS223 Birthday Greeting stamp sets.

How colourful is this! My favourite pastime too! I used Darkroom Door DDBR018 Row of Pencils and DDRS222 Party Balloons stamps with Copic markers and Prismacolor pencils.

There you go, lots of inspiration for you. I had lots of hours of fun creating these.

Happy stamping, Miss Jane xx

Re-visiting Card Techniques – Faux Linen

Gidday!

It’s been ten years since Cardmaking, Stamping and Papercraft magazine released a special issue featuring a few of my Classroom articles. I thought re-visiting these techniques would be a great idea and so did you apparently!

So the first one is – Faux Linen. This is an easy technique and will work with most styles.

Materials needed:

  • Glossy white cardstock
  • Course sandpaper
  • Range of ink pads: I used Distress Oxide Gathered Twigs, Antique Linen, Fossilized Amber and Worn Lipstick
  • Stamps of your choice, I used Taylored Expressions Best Buds stamp and stencil set.
  • tissues
  • heat gun

Here’s a YouTube video I made using other products, enjoy! Be gentle as this is my first YouTube video I’m sharing! I’m sure I’ll get better at it any tips or advice will be appreciated!

Have a try, I’m sure you’ll love the technique.

Happy creating

Miss Jane