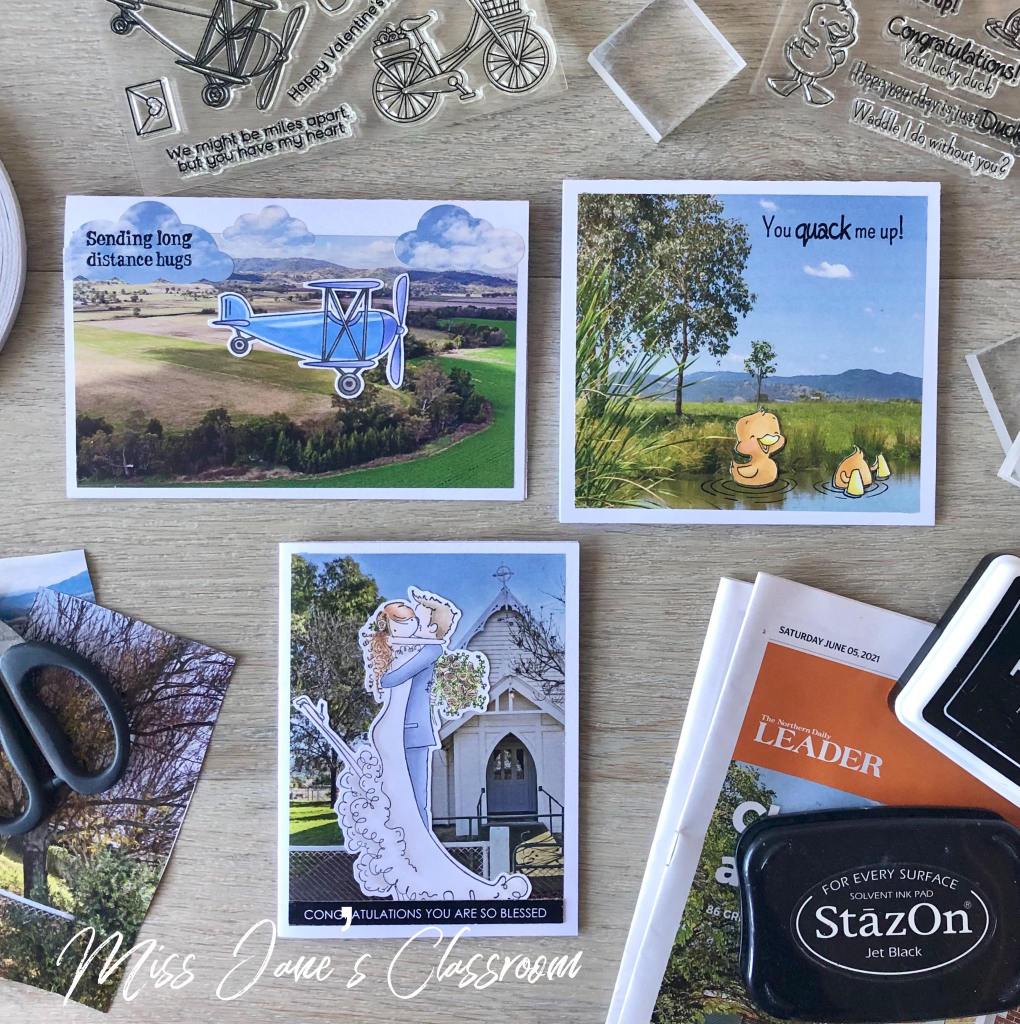
I was flicking through a Real Estate flyer the other day when I realised…… I don’t have to spend hours creating an elaborate Copic coloured background for my stamped images! I can just stick them on a picture instead! Of course you could use any magazine, which I have done before, many years ago but this rural real estate catalogue had really awesome aerial shots, one being perfect for a plane, then there was a church for sale, so helllloooo that’s a wedding card there, and one picture had a pond so out came my duck stamps! Gosh I had so much fun creating cards from that catalogue.
I used StazOn ink for the sentiments or if I stamped onto the pictures, they’re slightly glossy and I didn’t want them to smudge.
I also die-cut some clouds from another picture that had blue sky and clouds, it helped cover up the advertising.
So watch out any Real Estate agents out there, all your catalogues are going to disappear just like paint samples at Bunnings LOL.
Oh dear!! I just realised that the duck with it’s head under water must’ve moved before it dried!! Why do I notice these things when I’m just about to show and tell 😦
Wouldn’t it be lovely if you could use a picture of the church/garden/venue where the couple were getting married?! OR….this would make a great anniversary card too, just use a stamp image of a old couple instead! Oh dear my brain is definitely in overdrive now LOL
I hope you’ve been checking out Technique Tuesday awesome sale?! 20% off ALL STAMPS!! I keep going back and adding more LOL.
Here’s a card I made using Technique Tuesday Alligator and Crocodile stamp set. I love all the quirky sayings, it’s great for lots of occasions. When I saw the saying “How’re things in your part of the swamp?” I immediately knew I had to create a swamp background using my Copic markers, after a few minutes googling pictures of swamps this is what I came up with.
I had so much fun creating this card, don’t you love the bird sitting on the back of the crocodile? I have so many other ideas for this stamp set, stay tuned!
Tips:
Use Google, Pinterest, magazines etc for inspiration for your ideas, I’ve even taken pictures from watching TV!
Don’t forget to jot your ideas down, many times I’ve told myself I’ll remember that to only discover when I sit down to create I’m a blank!
Sentiments too long or in a block? Stamp them and cut them up, then arrange the words to suit the area on your card.
Persevere, sometimes my creations take a while to come together, many times I was on the verge to giving up when it finally came together.
Buy stamp sets that have multiply sayings for different occasions, you’ll get more mileage from them.
Okay, now it’s time for you to go off and check out Technique Tuesday’s designs, my favourites are the sets that have images with those quirky sayings.
Lucky you popped on here!! Technique Tuesday are having birthday celebrations, they’re having a sale, 20% off all stamps!! What fantastic savings!!
I’m sharing a card I made using Technique Tuesday beautiful Blooming Branches stamp set, it’s so pretty and the matching dies have the word “hello “included, I just love it!
Hello & Happy Birthday!
Sometimes just a colourful branch of blossoms is all you need on a fresh white card, although I did die-cut the bottom section using the matching die then added sparkly white paper behind it, such a very simple way to frame the flowers, don’t you think? I coloured the beautiful stamped image using Copic markers with not much blending, I just kept it simple.
I added a torn strip of peach Washi tape to the bottom, just to add some more colour. To finish I glued a few sparkly sequins for more pazazz!
Tips:
Use the matching die to frame your image, just offset it a little and back the die-cut section with glitter or even a contrasting colour.
A simple coloured spray of blossoms on white card is such a great clean classic look.
A torn strip of Washi tape that matches your image is a great way to add more colour to your card.
Stamp and die-cut your image from the bottom section of white card, this can then be used as your card front panel.
Okay, off you go, check out Technique Tuesday! There are soooo many beautiful designs.
I’ve been a bit naughty and have not kept my blog up to date, however I am really, really going to try my hardest from now on. I need to remember that my post can be short, full of tips and pretty pictures.
So today I’m sharing a whole heap of cards I have created in the last six months, not all of them, no one has time to read all that let alone read this long post! Maybe just look at the pictures LOL
Anyway, sit back and enjoy, maybe even make a cuppa. Oh and please excuse my spelling and maybe my gramma, I type the way I speak which can be double dutch sometimes.
Christmas in the Outback
This card I created for Uniquely Creative using their Aussie Christmas stamp set. You can find out more on how I made it HERE, there is also a video showing how I created the background using Copic markers. Enjoy!
Aye Aye Pirate 1st Birthday Card
Shiver me timbers this one was fun! It was a commissioned card, the call was: Pirate, Boy and 3rd Birthday! Done, done and done!! I used my Cricut machine and Design Space to cut these pieces then I coloured them using Copic markers. The recipient was very happy so I didn’t have to walk the plank! LOL
Ducky Day
This card makes me smile ever time! I used a Sugar Pea Designs stamp set called Quackers, it is the cutest stamp set ever!! I created the pond and background using Copic markers.
Waddle on to the next card!
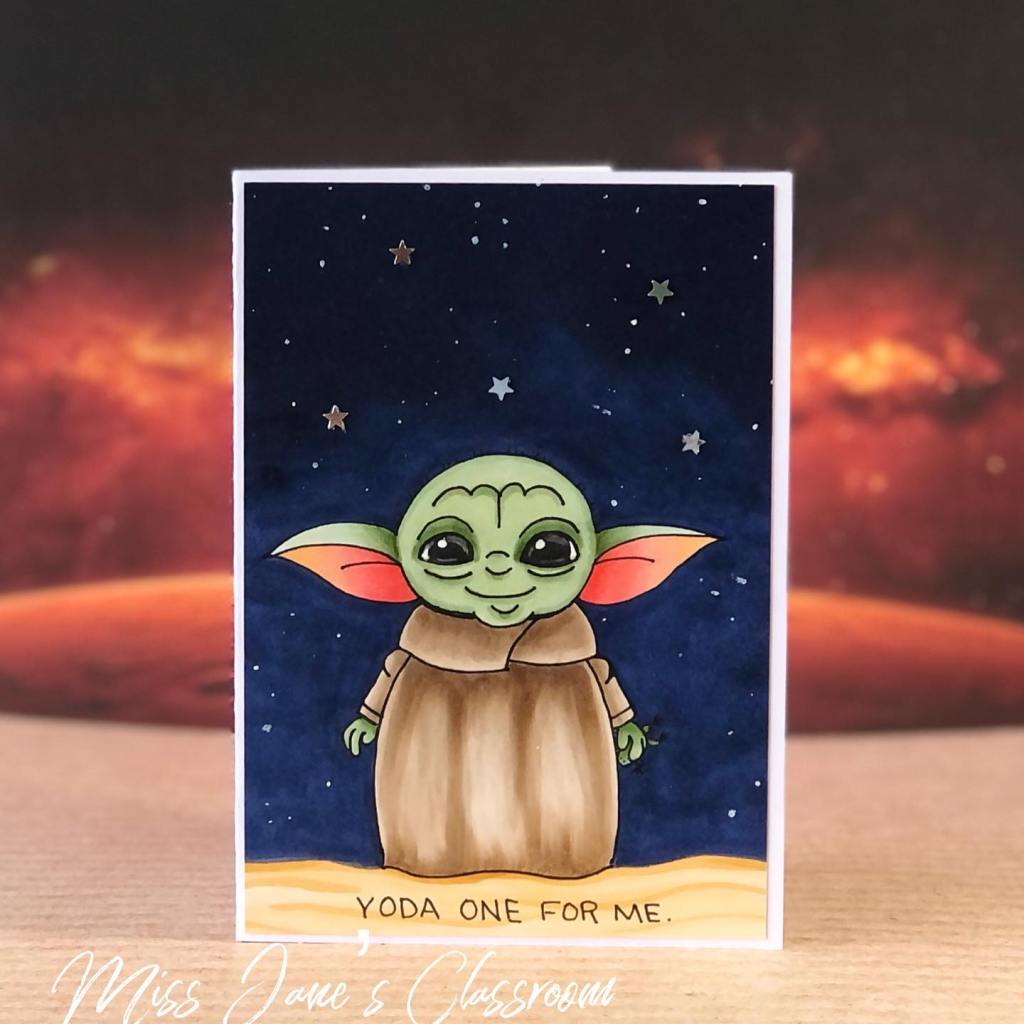
Toda one for me
This was the Valentines card I gave to my awesome hubby. I hand drew and coloured baby yoda? with Copic markers. My inspiration came from google.
Beam to the NEXT!
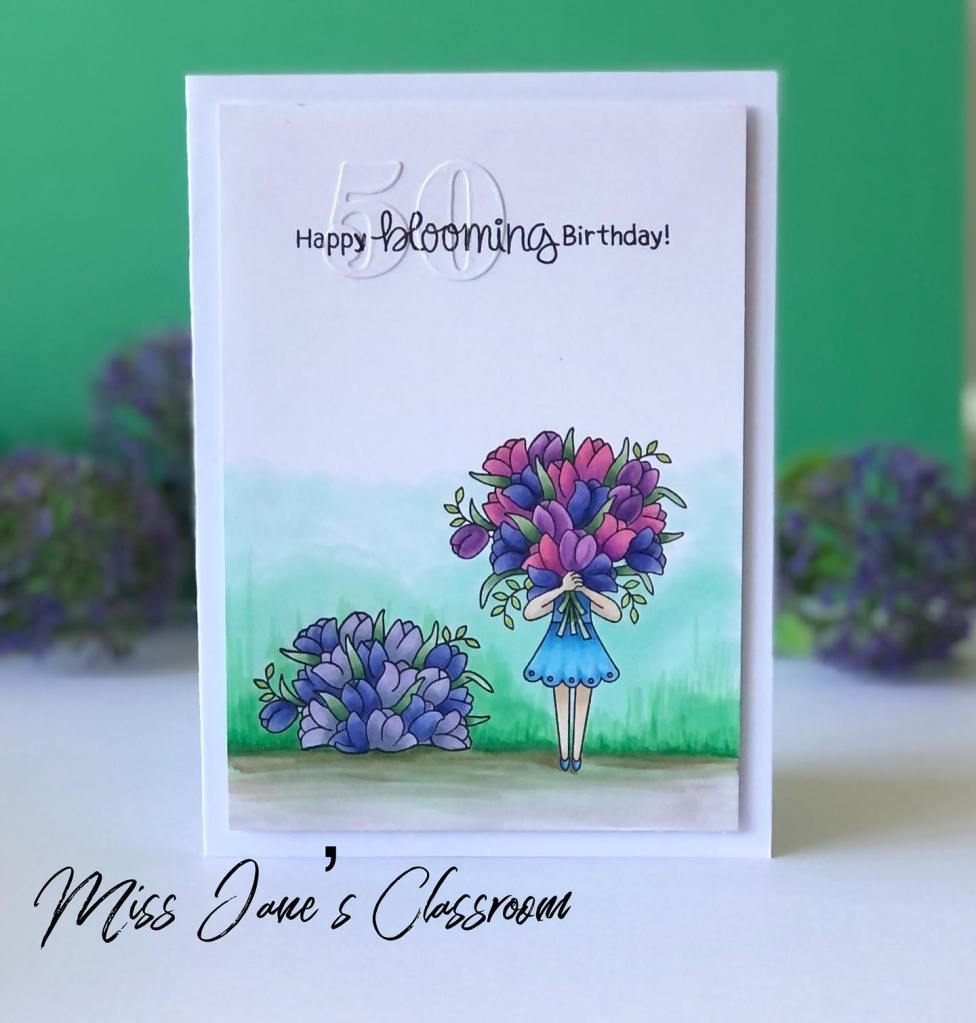
Blooming 50
I wanted to create a 50th birthday card but not have the numbers in your face! So I cleverly disguised it by die-cutting the 50 from the same white card then stamped over the top. I coloured the images using Copic markers. I masked the bottom section of the image (dress and legs areas) to create the flower bush, just another way to use the image! Up there for thinking 😉
Tip: Stamp the sentiment first then stamp it again on your die-cut pieces, attach the die pieces over the top of previous stamped sentiment using glue. I made the error of stamping directly over the top after they were glued down, which is fine but you will need a very fine black permanent pen to fill in any areas that didn’t make contact with the cardstock. Rooky mistake, mustn’t have had my coffee before creating!
NEXT
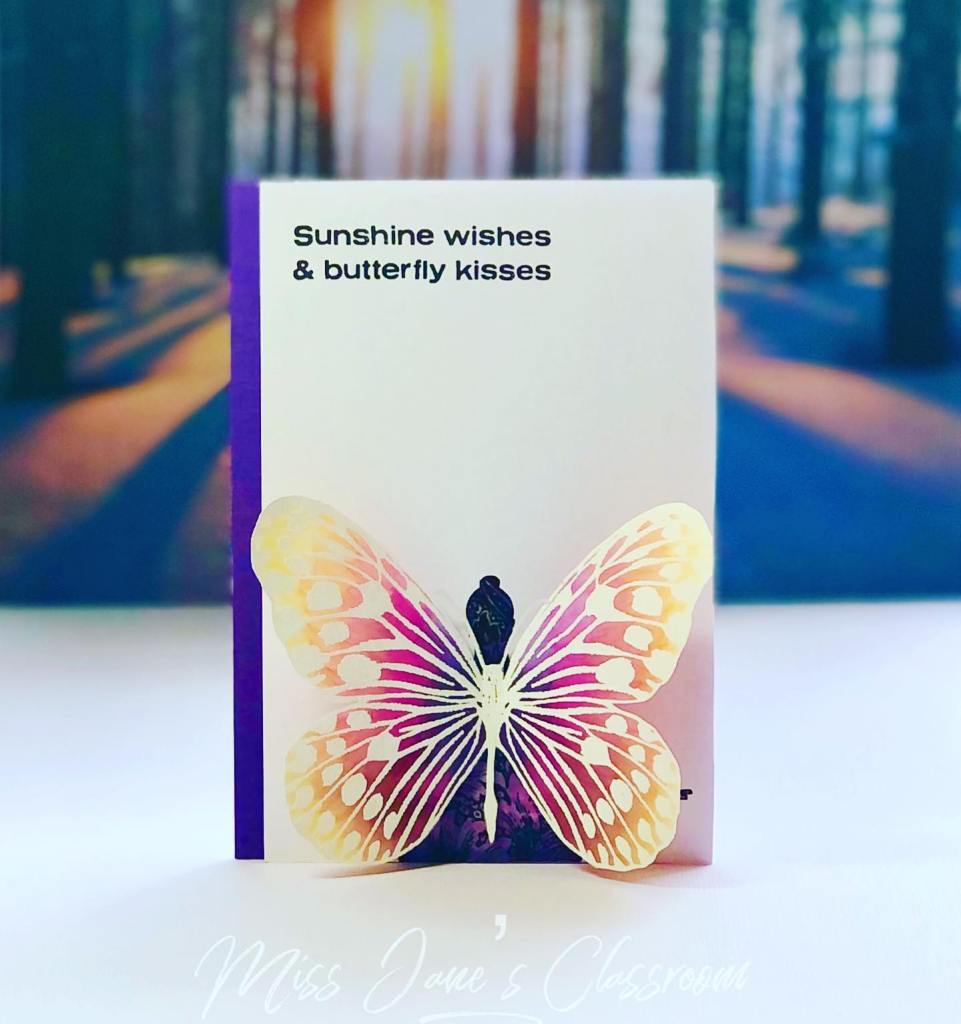
Sunshine Wishes and Butterfly Kisses
Do you sometimes make a card and just stare at it? This one had me captivated, the sun was shining on it while I had it on my desk, it was magical. I know I say this a lot but this card is one of my favourites, it brings so much joy! The yoga lady from the Meditation set and the butterfly are both from Darkroom Door.
I stamped and white embossed the butterfly on vellum, then I coloured the other side using Copic markers. The yoga girl was also coloured using Copic markers. I need to make thousands of these and send them to everyone to create peace and magic in their day!
Flutter to the next…..
This is the same butterfly from the yoga girl card, I also used the smaller butterfly. I stamped them again on vellum using VersaMark and used a yellow inkpad on the back. The background is a Darkroom Door Daisy Delight stamp, gorgeous isn’t it?! I coloured the Daisy Delight stamp by applying my Copic markers directly onto the rubber, then I lightly sprayed Copic blender solution over it then stamped it on smooth white card using my Misti stamping tool. I cleaned the stamp then applied VersaMark ink on it and stamped it again, I poured glitter embossing powder over the image and heat set it, what great sparkly colours it created! A very cheery card don’t you think? That background daisy can be used in soooooo many ways!
NEXT, having fun yet?
Life would succ without you
I love succulents, do you? If you do then you need this stamp set, if you don’t then you still need it! Uniquely Creative Succulents stamp set. See that pot plant that’s tall, growing crooked in the pot, I have that, it’s weird but I love it. Now, can you see the cat, don’t ask why I did this, the Copic markers just have a mind of their own sometimes LOL, the cat is sitting in between the pots with it’s back facing us. Yes a lot of my cards have little stories!
NEXT..
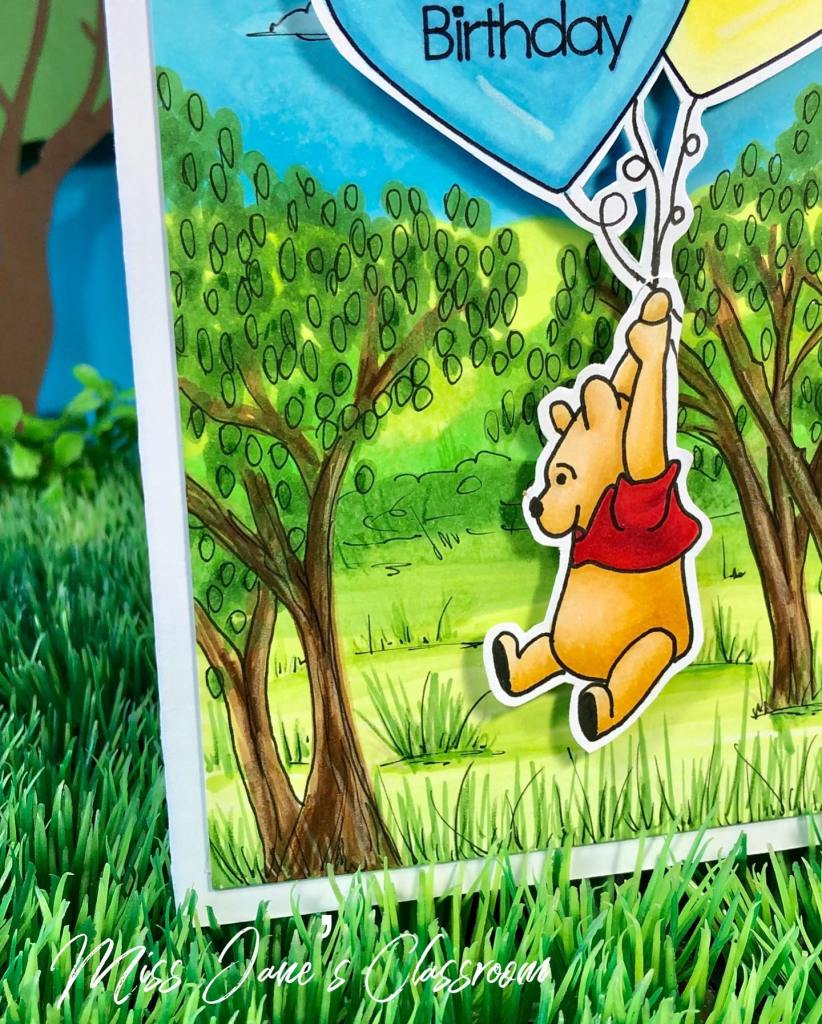
Winnie the Pooh
Another favourite! This was a commissioned card, requirements: Winnie the Pooh, boy and 1st birthday. I googled some pictures of Winnie the Pooh and drew this one, the balloons I are from Cricut Design, the background I created using Copic markers and a fine line black permanent pen. Now this card possessed me, I had no idea what I was going to do but I found that image then thought balloons and I was off, the background just grew and grew! I LOVE when this happens, every card is like a journey but some you step back from and think “where on earth did that come from”? Can you relate? Seriously, it’s like I was possessed, in a good way, by the cardmaking fairy!!
I love creating commissioned cards, the challenges keep my cardmaking mind active 🙂
NEXT
Purple Elephant
Now, did I say I love commissioned cards? well….. my next one was for a 1st birthday, a girl who’s favourite stuffed toy was a purple elephant!!! Oh my goodness, okay, okay, I can do this………………………………………………….now imagine that every one of those dots was an hour of my time just thinking! Eeek, I was a blank, oh dear! Cricut Design space to the rescue, gosh I love that machine! I don’t make many cards that are just cardstock, most are stamped and coloured. Well….now I’m a BIG fan of purple elephants!! Didn’t she turn out great? Well I thought so and the recipient said it was a perfect match in colours! Yay another happy customer! What challenge is next I wonder? I love the process of it all, I really do!
Love your to pieces
Who loves to watercolour? Me! Sometimes I need a break from my Copics, they can be intense sometimes, don’t get me wrong, I LOVE them but watercolour is soooooo relaxing! These puzzle stamps are from Darkroom Door, the set is called Puzzle Pieces, there are great sentiments to go with these and other designs as well, it’s a great set for many occasions. I used Distress Oxides inks to stamp the images, then I dabbed the ink pads on my Tim Holtz mixed media mat and pick up some colour using my Aquabrush pen and coloured away. I let the colours pool in spots, I didn’t want to just colour the whole image, let them create their own path, have fun with them.
Okay my last card I’m sharing, I’m tired from tying LOL, I have more cards to make!
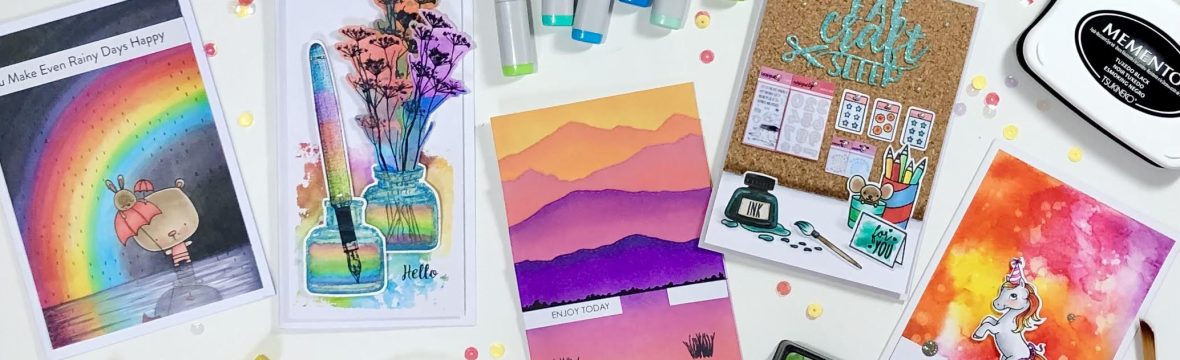
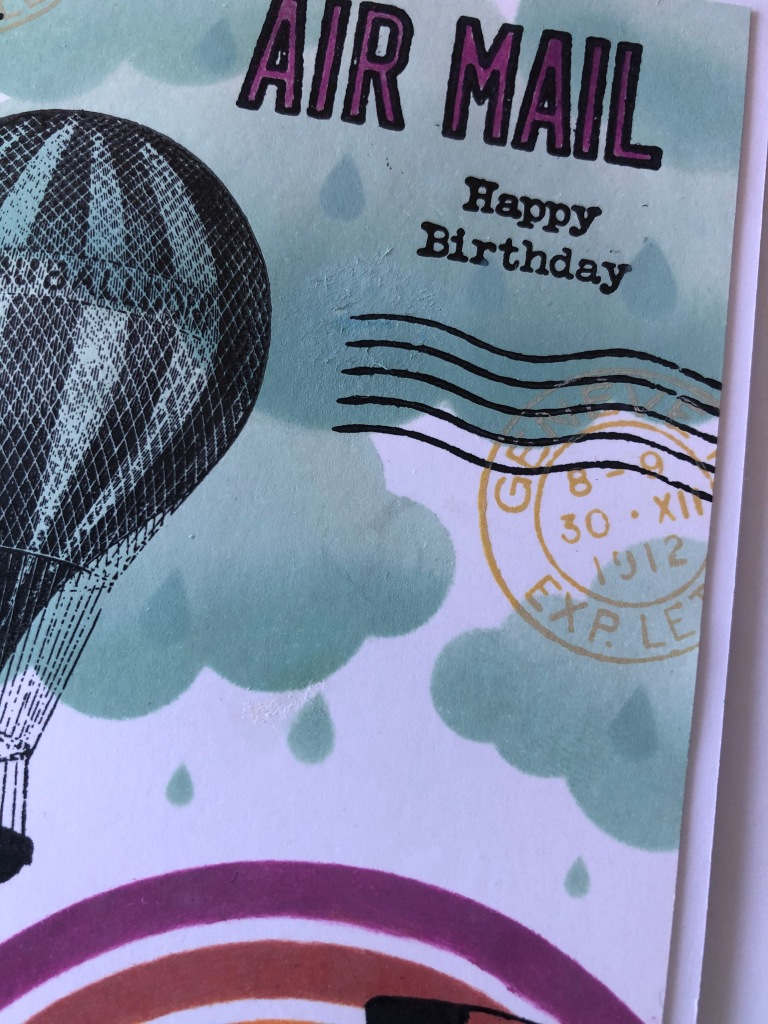
Everybody loves a rainbow, I’ve been seeing them all over Instagram, Facebook and blogs, so I just had to make one, with a reflection of course! This card took many hours, the blending back and forth, I’m not going to lie, I did swear a bit creating it and it nearly ended up in the bin! I’m a bit of a perfectionist I think but I wasn’t going to let it get the better of me! Once I start these cards I need to finish them, to get the idea out of my head, otherwise it will stay there and haunt me forever LOL. Does this happen to you? Please tell me it does and I’m not going cardmaking crazy!!
The stamp is from My Favourite Things called Sprinkling you with Love, it has so many adorable images and the sentiments are delightful.
I cannot begin to explain how I created this card, just as I said, many, many layers of Copic markers, blending back and forth, repeat and repeat. I may need to give myself this card on a rainy day, it aren’t going anywhere to anyone!
Well that was a lot of cards, did you make it through them all? If you’re reading this then you must’ve! Good on you and thank you so much, I do waffle on sometimes! If you have any questions in regards to any of the cards then please send a message, I would love to explain further.
Now go and create, that’s enough reading, wake up that cardmaking fairy and get cracking!
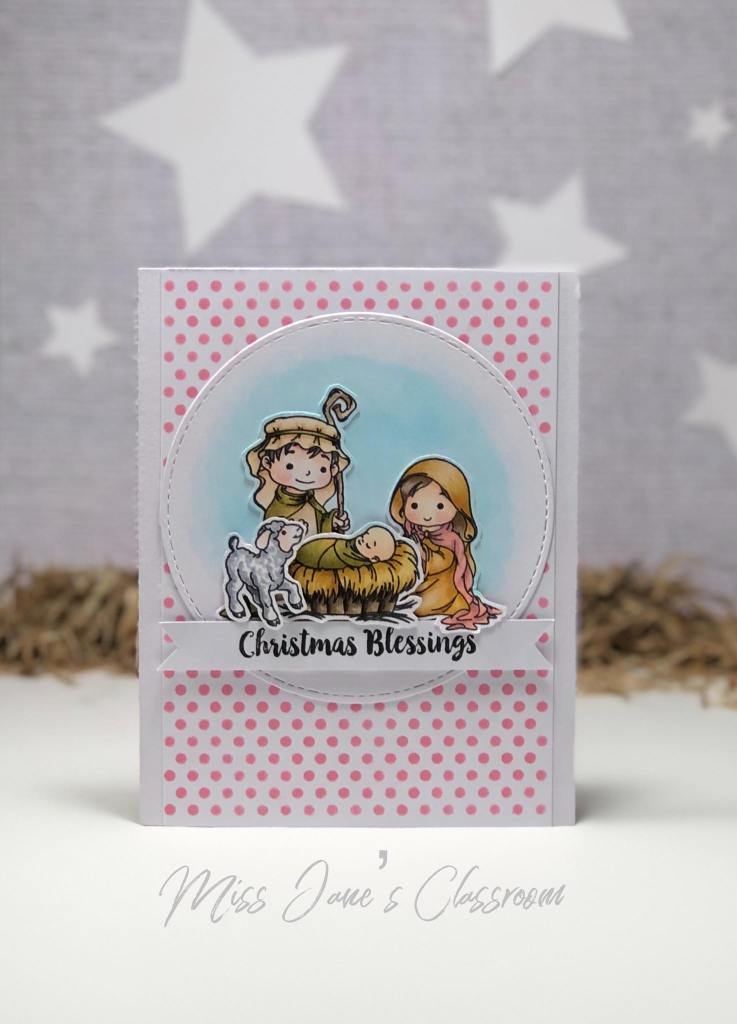
I was very excited to be invited by Michelle Lupton to participate in her inspiring challenge – CASE (Copy, and Share Everything) me a Christmas Card this year. The challenge was for me to Case one of Michelle’s cards and make it in a Christmas theme, visa versa for Michelle to Case one of mine and turn it into a Christmas card.
I must admit, this is the first time I have ever ‘Case’d a card, for those who may not know what it means, it’s Copy And Paste Everything, it’s such a great way to get your mojo going if you’re ever stuck for an idea! I’m sure you’ll get plenty of inspiration from this awesome challenge, it’s such a great way to see how another person can change and adapted a card, I love it!!
So here’s my card:
I used Uniquely Creative First Christmas stamp set, Copic markers, Darkroom Door small dot stencil, Distress Oxide ink worn lipstick.
So basically I kept to the layout , a stamped and coloured image on a circle, sentiment on a banner and a pink spotted background.
Here’s Michelle Lupton’s card:
So go to Michelle’s Lupton’s blog and check out all the other cardmaking guests and see how Michelle Case’d our cards, she’s very talented!
Thanks Michelle for inviting me to participate, total fun!
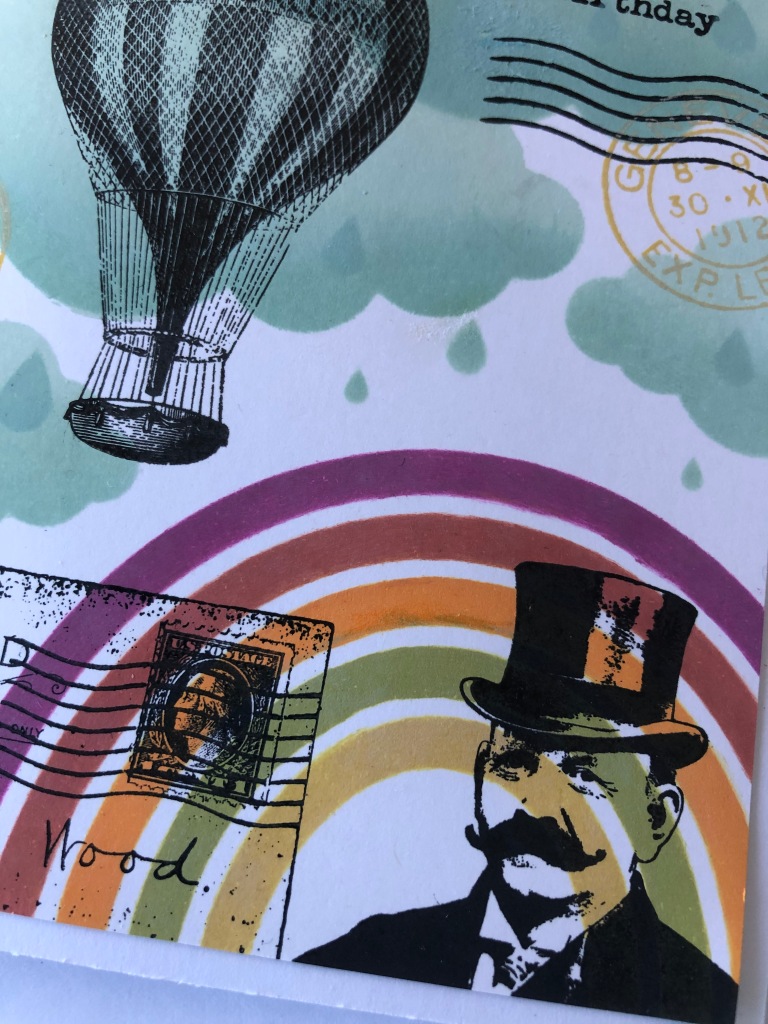
Here’s another idea on how to use Darkroom Door cloud and rainbow mini stencils with Dylusions slate grey shimmer spray and my all time favourite product at the moment, Ranger Stickles moon dust glitter gel. This gel is so sparkly with little bits of iridescent particles in it, the best part is that it doesn’t go everywhere like loose glitter!! I used Prismacolor pencils to create the rainbow and ‘You brighten my day’ is from Darkroom Door Friendship sentiment stamps. So many ideas on using these stencils, I think they will be a go to product for a lot of my cards!!
I hope this card have given you some inspiration and you’ll give it a go! Stencils are always a lot of fun!
I’m sharing a very different style of card today, not one Copic marker was involved in this creation! I used a selection of Darkroom Door stamps and their new Mini Stencil Sets – Cloud and Rainbow. I think the style would be called funky? Well I say funky, what would you say?
It’s always good to give another style of card a go, broadens your creativity!
Darkroom Door also sells these fantastic Ranger Detail Blending Tools that fit perfectly inside the rainbow cut-out sections, they make life so much easier! Check out my Miss Jane’s Classroom Facebook Page or Instagram to watch a video on how I created the rainbow.
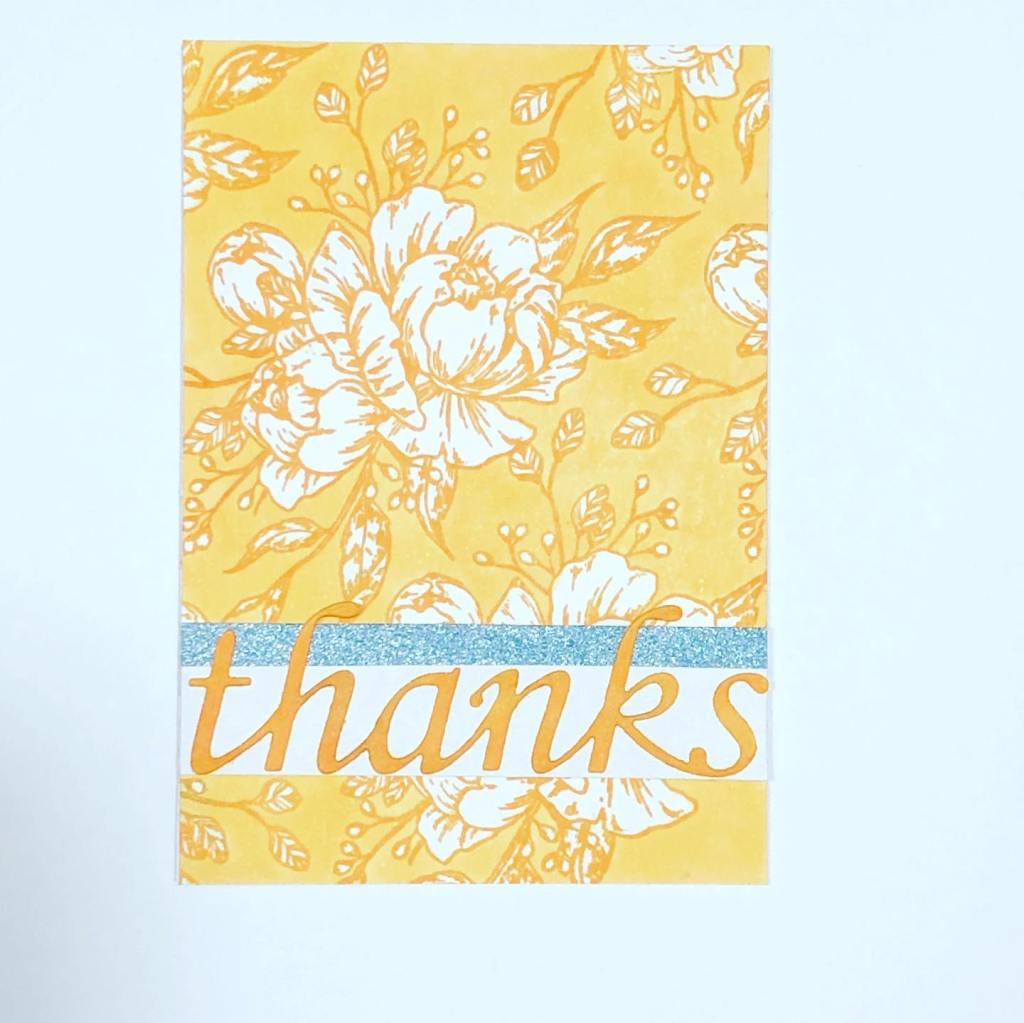
Right, my craft room is all set up, now what? I sit, I ponder, I go through my stamps, I look out the window, make a coffee, ponder more! Okay, let’s start with something simple I say to myself, monochromatic stamping and colouring, simple cards! That’s probably the hardest thing to do Jane! What are you thinking?! Me! Do simple cards!! Bwahahaha
I grabbed a floral image from The Stamp Market Floral Bouquet set which I bought from Auzz Trinket NCrafts I stamped the design a few times on white blender card using a Distress Ink pad, then coloured between the images using a Copic marker in a lighter version to the ink. I had a background done in no time, then another and another, five backgrounds later and I couldn’t get off the monochromatic merry-go-round LOL.
Anyway, it was all good fun creating again. Here are my first few cards I’ve made in my new craft room!
I’m just very happy to be creating again! Hopefully I’ll get off this monochromatic merry-go-round and find another idea to try!
Thanks for stopping by, happy Stamping! Miss Jane xx
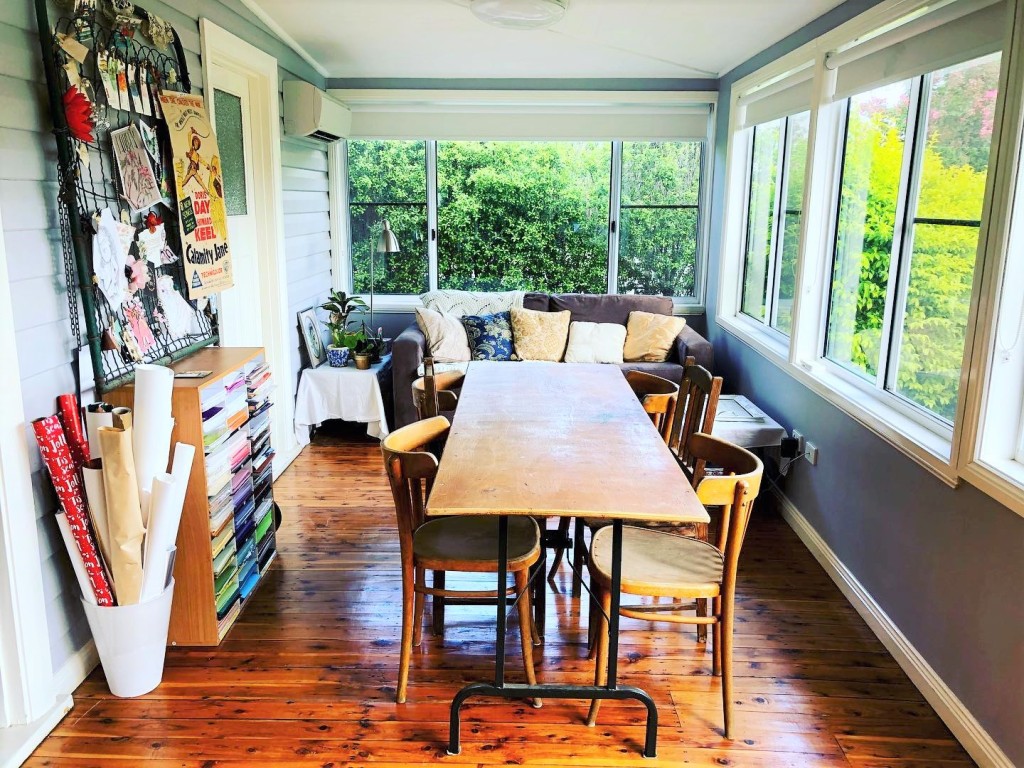
This is out fourth move in four years since moving to Moree NSW, this time we’re just moving to the house next door! Unfortunately we had to move out of the bigger house with the lovely chandeliers, shiney floor boards and country charm to the house right next door! This house is smaller but it’s still beautiful and has air-conditioning in every room, bonus!
They say, “home is where you make it”!
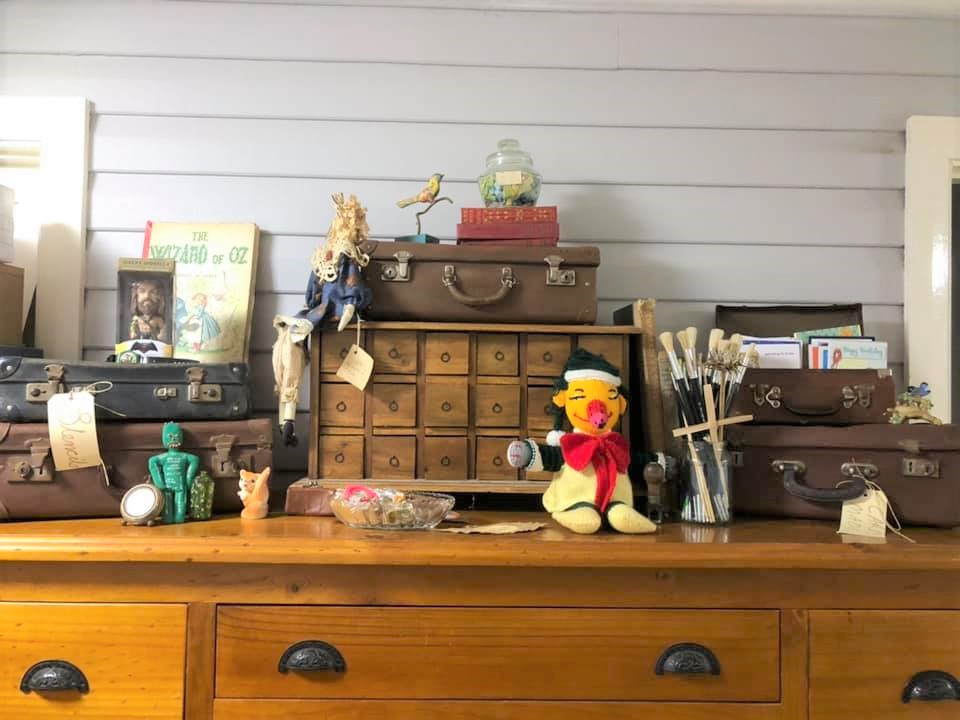
The most important thing is…….I have a huge craft room with lots of beautiful natural light, it’s awesome! I have have an area that I may start up classes again, who knows.
I’m looking forward to seeing what creations are made in this space!!
I was tickled pink once again to be asked by the super talented Michelle Lupton to participate in her fabulous Christmas Card challenge. This challenge is where Michelle asks us to come up with a theme for a Christmas card and make it, Michelle then has to create her own card using that theme!! My challenge to Michelle was “Aussie Christmas”.
So here’s the card I came up with, I used Beccy’s Place Emu Parade stamp set, coloured the emus with Copic markers and Prismacolor Pencils.
Now you need to go and check out Michelle’s card on her blog HERE, I haven’t seen it yet as I write this blog post, I’m very excited!
It’s such a great challenge and Michelle is very clever in adapting her cardmaking skills to each theme, don’t you think!
Thanks for having a look and happy stamping. Miss Jane